You might be wondering how can someone change the information displayed in the System Properties of Windows. There are good reasons to change this as well, like if you installed Windows on a newly built custom computer, you may see “To Be Filled By O.E.M.” in front of the Manufacturer and Technical support details in System Settings.
Changing above mentioned information will not have any impact on your computer, but it does look good if the owner’s or the company’s name is written there if it is an office computer. In this article, we will explain two ways through which you can change the OEM information displayed in the System Properties of Windows 10.
Change Windows Manufacturer Details – Registry Editor
I have created a Windows Registry File (.reg) which can easily change any registry based fields you want by just running the file. These Registry Editors are “.reg” files that will make changes to the registry and these aren’t hard to make as well. Here is how you can make changes in the info displayed in System Properties:
- Open Notepad
- Paste this in the notepad:
[HKEY_LOCAL_MACHINE\SOFTWARE\Microsoft\Windows\CurrentVersion\OEMInformation]
"Manufacturer"="Hackology"
"Logo"="C:/hackology.bmp"
"Manufacturer"="Hackology"
"Model"="Hackology v1"
"SupportHours"="Hackology"
"SupportPhone"="Hackology"
"SupportURL"="https://hackology.co"
Note: You can replace “Hackology” to anything you like, and also add more options like Phone, Product ID etc. For Logo, you need to put a .bmp file at C:\Windows\system32\OEMLogo.bmp


- Save the Notepad file and give it any name you like. Your newly created text file will have “.txt” extension
- After saving the file right-click on it and select rename. When renaming change the “.txt” file to “.reg” file. For example, if the file was “hackology.txt” then you will change it to ” Hackology.reg” file.
- Double click on the file and select “Yes” when prompted to make the changes.
- Restart your PC and your changes will be reflected in System Settings.
Manually Changing Windows Registry
If you want to do it yourself without using the above method, follow these steps :
- Search for “Registry Editor” in the search bar and run it. You can also type “regedit” in Run to open regsitry editor
- Navigate to: Computer\HKEY_LOCAL_MACHINE\SOFTWARE\Microsoft\Windows\CurrentVersion\OEMInformation
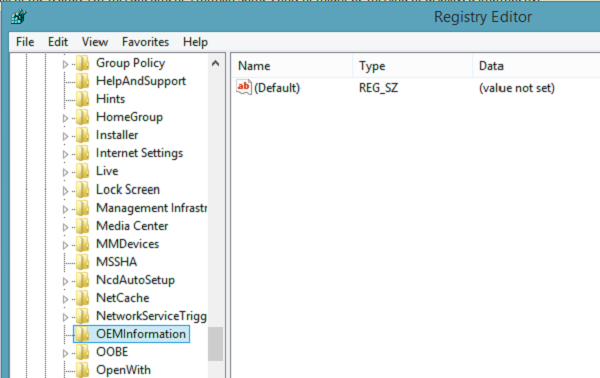

NOTE: If you have a new Windows, then you will see an empty OEM information. However, if your PC is an OEM product, then the name and support of the manufacturer will be present along with a number of strings with the following value names displayed:
- Logo
- Manufacturer
- Model
- SupportHours
- SupportPhone
- SupportURL
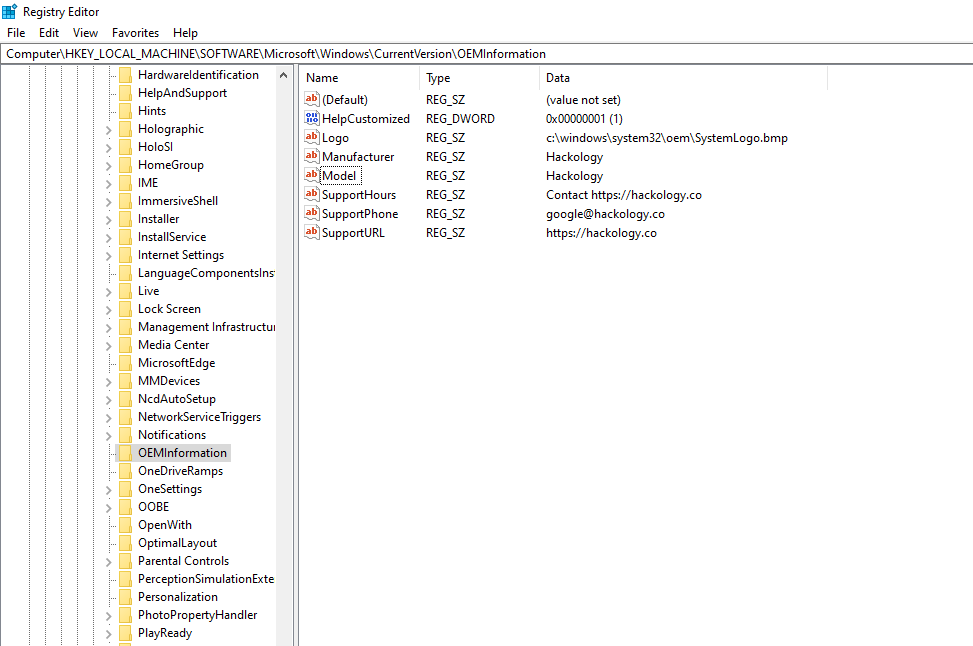

- In order to add OEM information to your PC, select the type of information that you want to show and start creating values for each area you want, with value names specified in the list above.
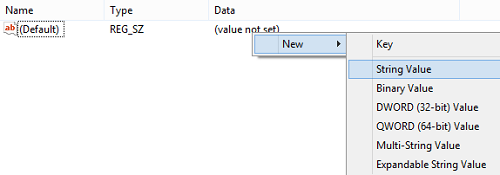

- Right-click on the empty space and choose New > String Value. Input a corresponding name listed above in the list
- After doing so right-click on the value you created and select modify. The “Value Data” which you will input will be displayed in the System Information.
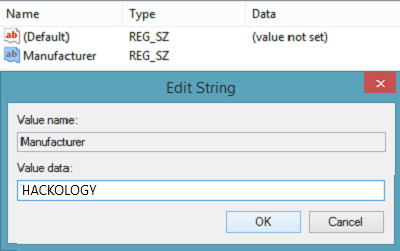

- After adding the information open the control panel and see section ‘System.’ You will see information from your new manufacturer. If you add additional values, such as the phone number or the site, then they will appear in a separate “Support” section.
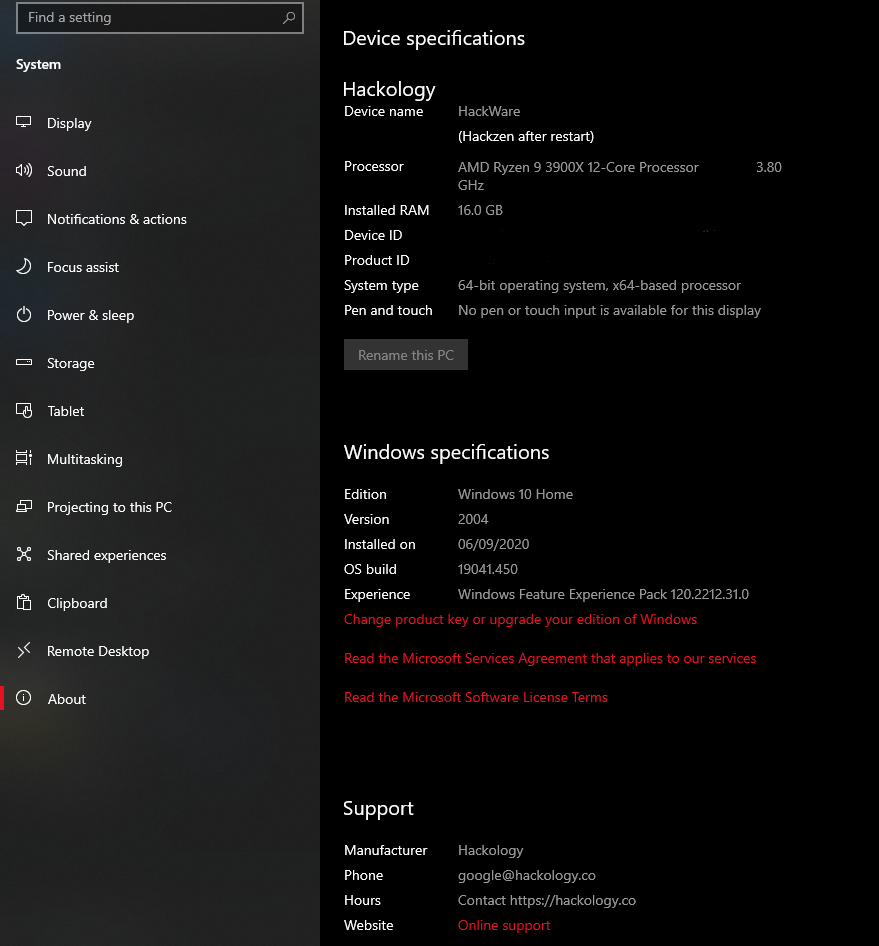

You can also change the logo if you want by simply replacing it with the original logo’s location in “C:\Windows\system32” but make sure it doesn’t exceed 150 Pixels.
Conclusion
There can be many reasons why one would want to change these values but nonetheless, Windows provide us with a way to change these values and add whatever values we want which is a good thing. This is the complete way of updating your OEM info that will be displayed in the system information. Let see what creative OEM Information you guys end up keeping




Add comment