
This tutorial will show you how to root your PTCL Charji Wingle R660 A to unlock all locked out features by the service provider in this case, PTCL.Which will also enable the most wanted Port Forwarding on PTCL Charji / EVDO devices.
Rooting PTCL Charji Wingle unlocks Features
A question we all have , what do we achieve after we root our internet device ? . Well, rooting allows you to access :-
- Root (Admin) access of the Charji Evo (MiFi) Device which means you can do literally anything
- Flash a new firmware if you get hold of one or know how to customize your own and run it
- Enable Port Forwarding / Virtual Servers on the device
- Enable NAT on Charji Evo
- Enable Security Tab
- SNMP monitoring
- Use Data Sims of any other network
- Change branding of the admin panel of the device to anything you like , do not like the PTCL logo everywhere ? well you can change it
- Experience
- Opens a door for future experimenting
Telnet into PTCL Charji Wingle
Connect to your Charji device and telnet to the router IP (generally 192.168.1.1), once prompted with login you can enter admin as Username and Password
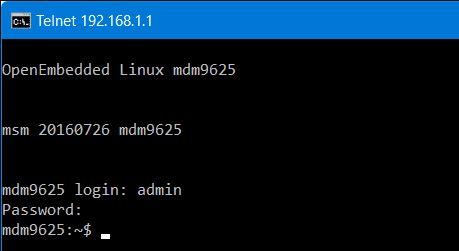
although we were logged in but currently the above credentials are mapped to mdm9625 user account which is not part of root group. The Linux flavour being run is OpenEmbedded Linux LNX.LE.4.1-41009-9×35 which supports Qualcomm chipset as found on most PTCL Internet devices
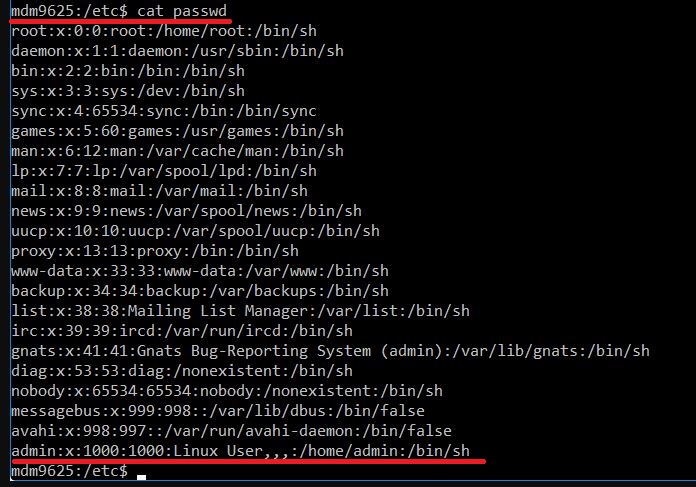
so mdm9625 has just access to /home/admin , and that is also No Write Access, root user has no known default password so can not login through telnet in the first go now lets go ahead and root the shit of this device
[Tutorial] Root PTCL Charji Device and unlock all features
[sociallocker]
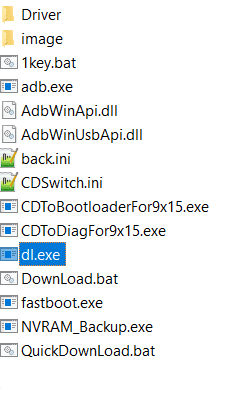
- We need to turn our PTCL Charji Device in to Download Mode which allow us to proceed with our rooting, Download Firmware of D-Link DWM-222 4G USB Adapter.
- Extract the above downloaded file and you will find a file dl.exe (it might be in Temp Folder)

- Connect your PTCL Charji Device through USB and run dl.exe, your PTCL device will now be in download mode and ready to obey our commands
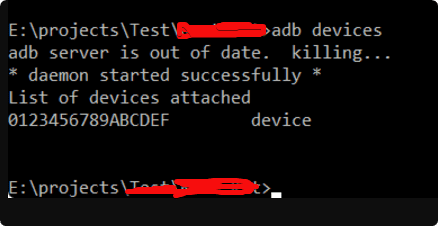
- While the device still connected run adb devices and you will see your connected PTCL Charji Device
- Next, type in adb shell, this will open up ADB Shell on PTCL device
- Enter passwd, you will be prompted to enter a new password. This password will be of root user so do not forget this while entering a good one
- Exit the Shell (Close Terminal)
- Press and Hold the Power and turn on the PTCL Device, connect to it and again $>telnet 192.168.1.1
- Enter your device login admin/admin (if you have changed your router page password you will need to enter this here)
- Once logged in type su, which will prompt to enter password. This is the password for your root account. enter the password you kept in Step 6, viola .
Note: You can directly login as root user aswell , telnet to 192.168.1.1 and enter username root and password which you kept in step 6 - Now you have root rights (you own the device now literally)
[/sociallocker]
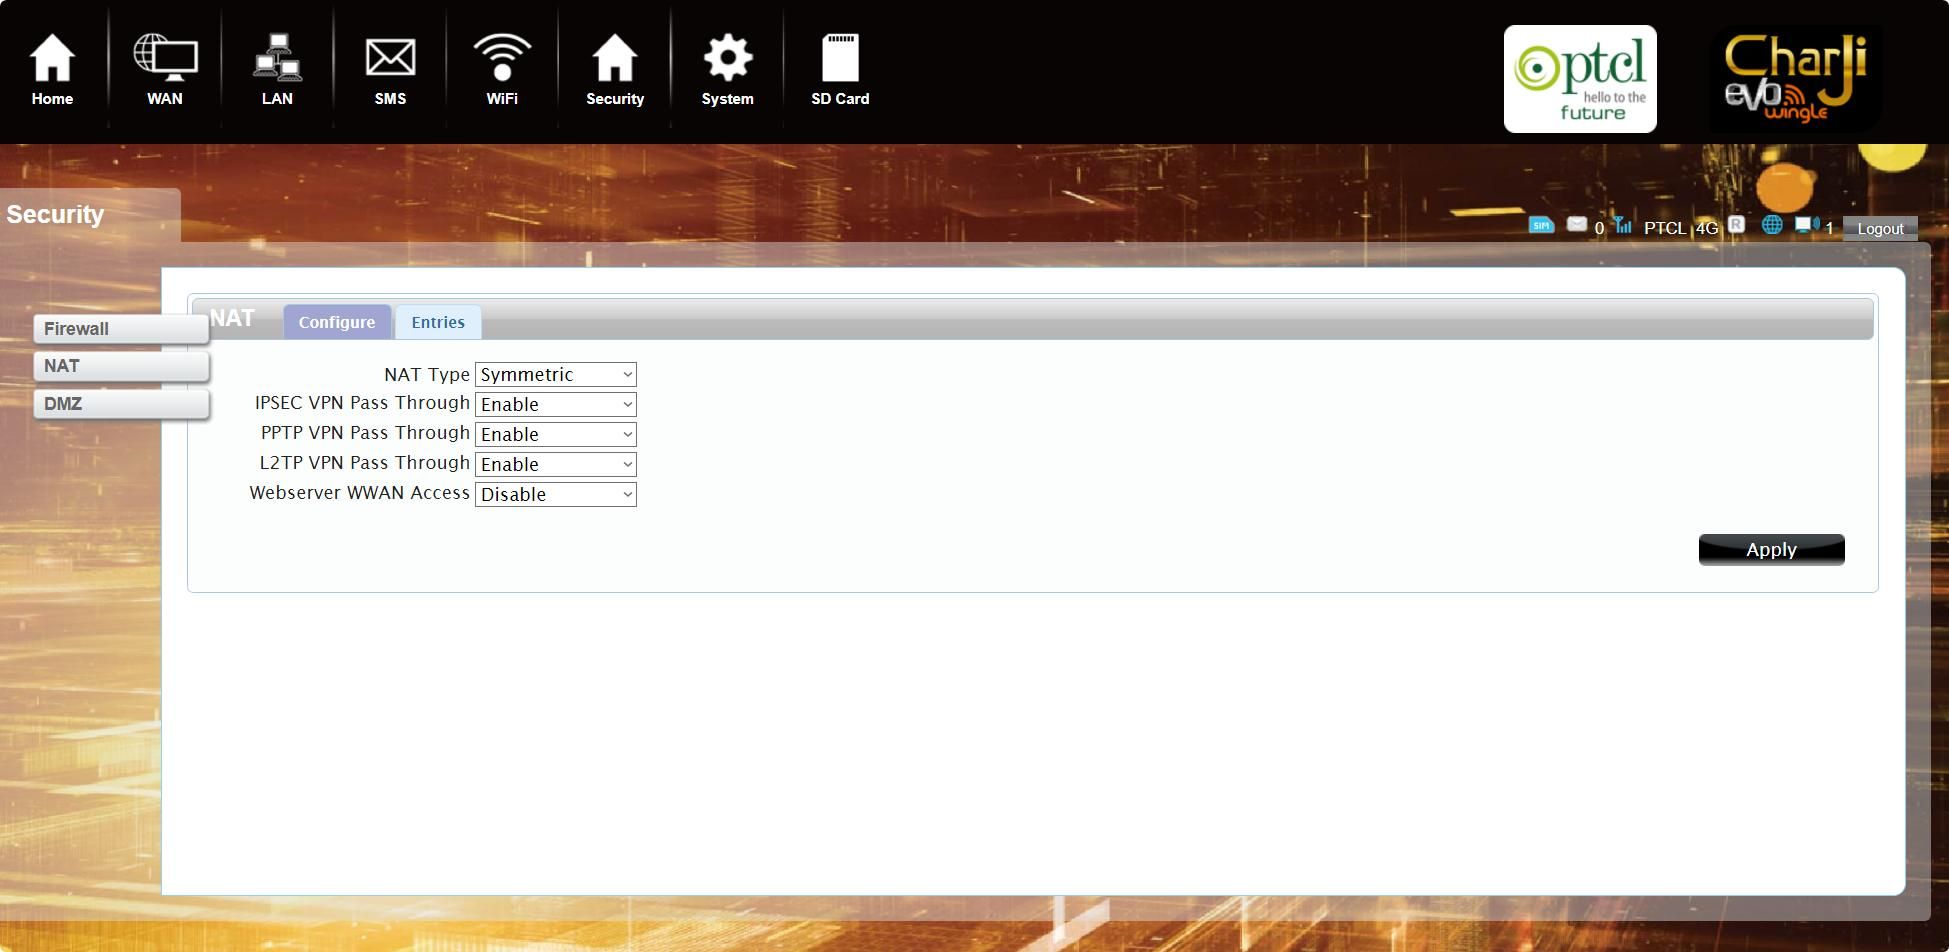
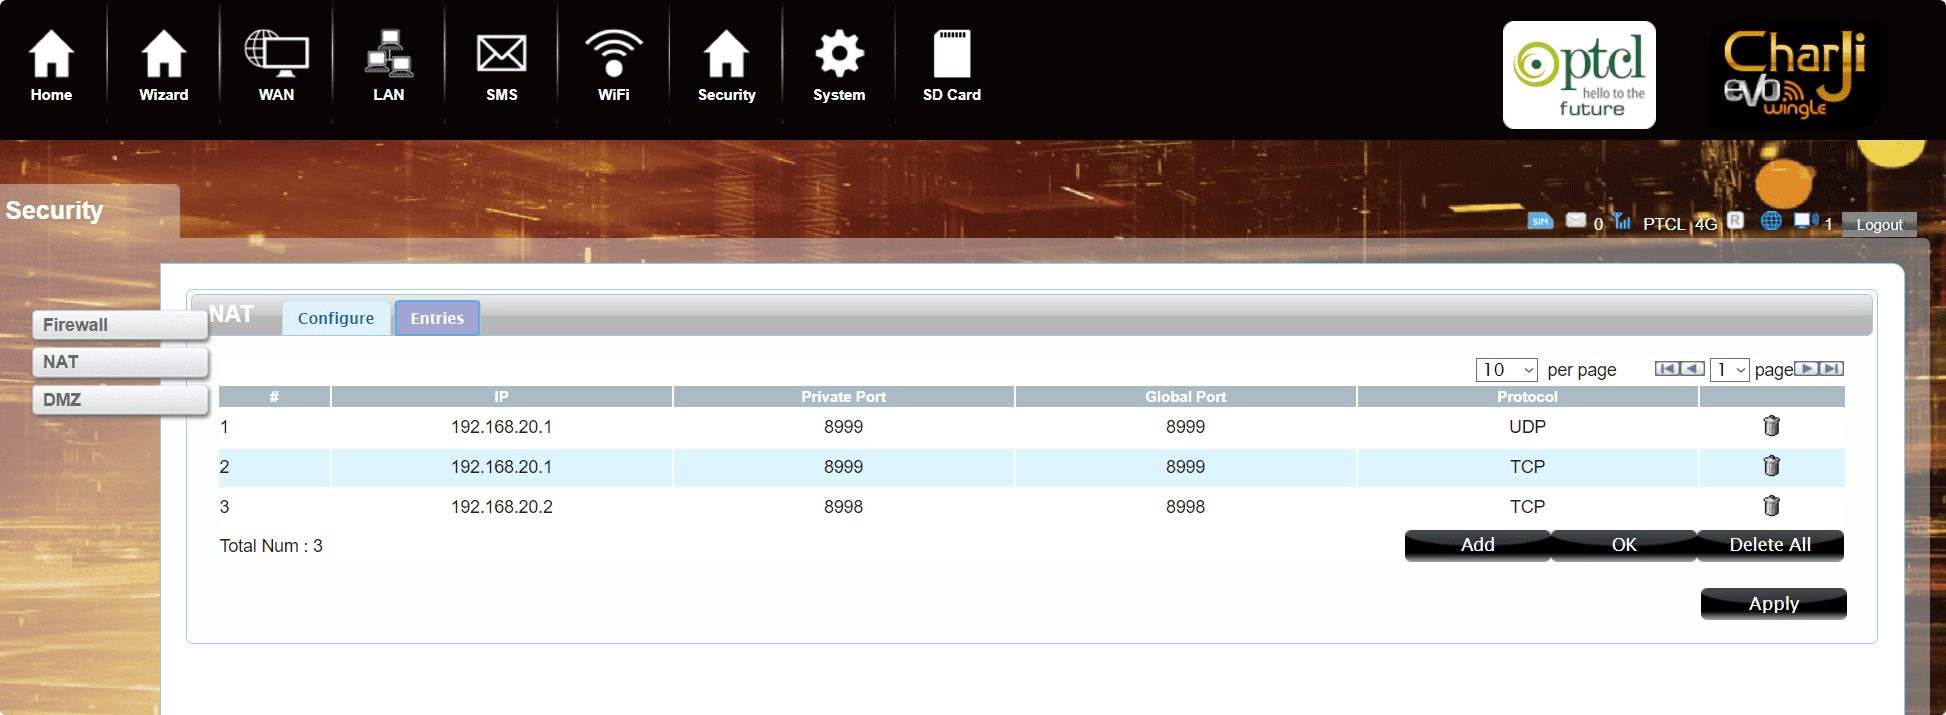
Enable NAT/DMZ (Port Forwarding) on PTCL Charji Device
If you reading this means you have successfully rooted your device now just ahead and unlock our favourite port forwarding,we can achieve that using two methods, I will list both
Method 1 – This method involves entering port and ip for forwarding while in the terminal
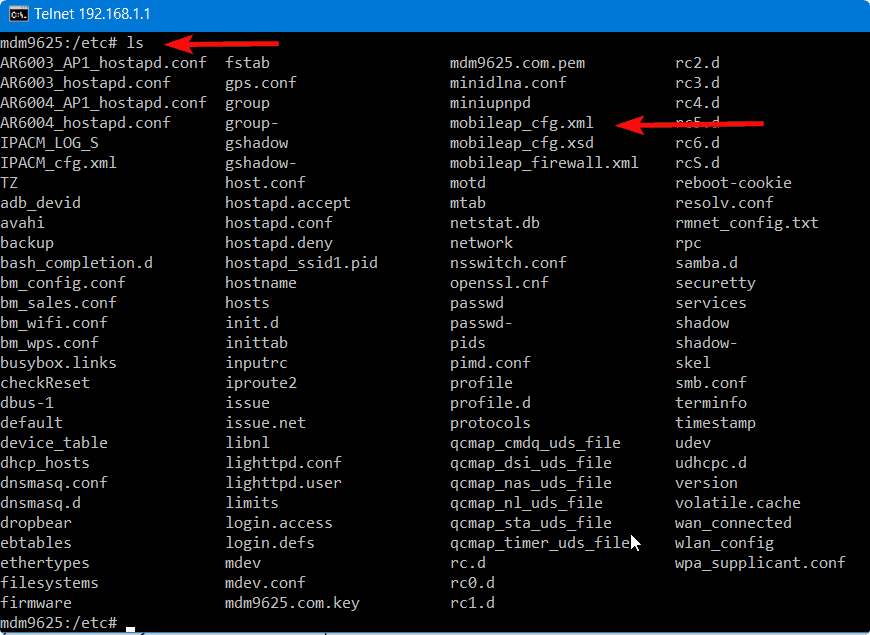
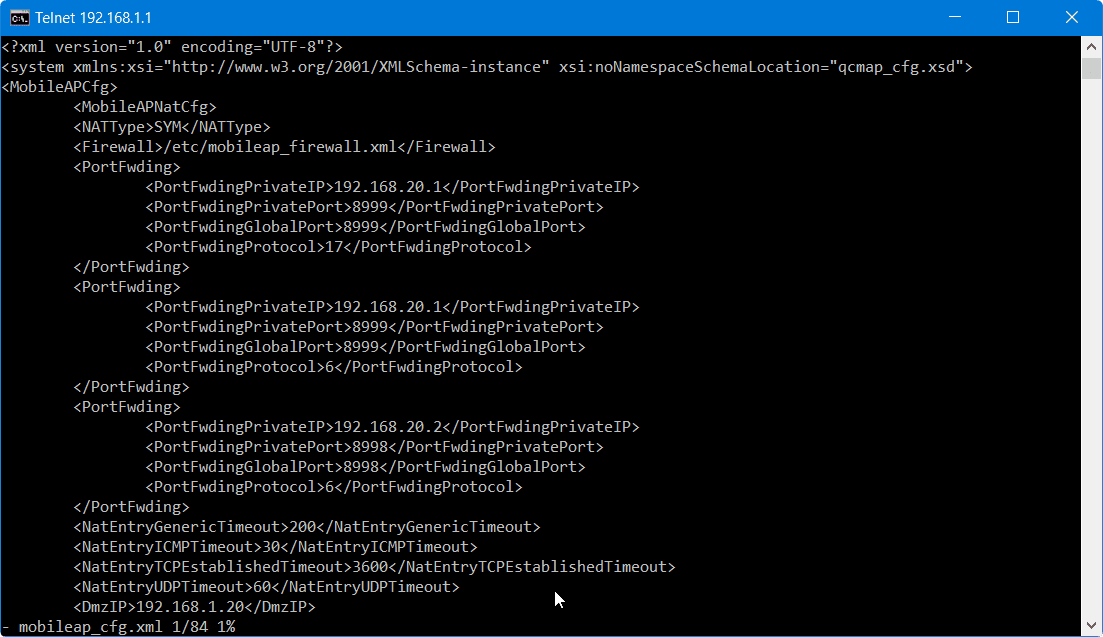
- Navigate to /etc/ and open mobileap_cfg.xml
- Edit mobileap_cfg.xml and add your local IP and the port you want external traffic to route too , you can add as many internal IPs and Ports as you wish by just copying and pasting everything starting from <PortForward> … </PortForward> and change the values which you want.you will only have VI editor to make your changes from within the terminal
- That’s all for this method showing how to enable Port Forwarding on PTCL Charji Devices
Method 2 – This method will enable the Security page in PTCL Charji Web interface and we will be able to do port forwarding etc from there.
- Telnet to 192.168.1.1 and login with your root credentials
- Navigate to /WEBSERVER/www/
- Edit menu.js
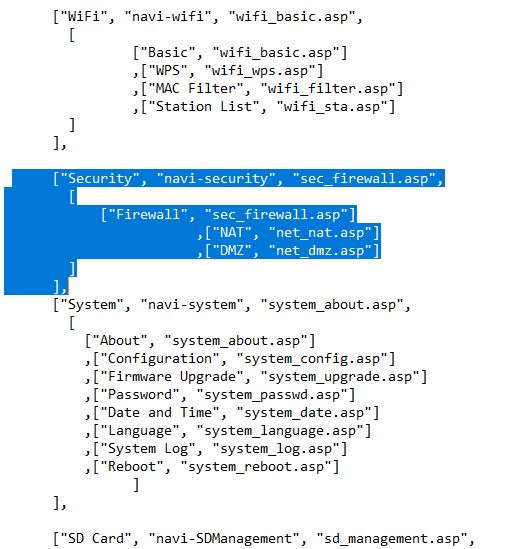
- Add the following code into menu.js
["Security", "navi-security", "sec_firewall.asp",
[
["Firewall", "sec_firewall.asp"]
,["NAT", "net_nat.asp"]
,["DMZ", "net_dmz.asp"]
]
], - You can consult the image below for guidance or see the complete code of menu.js
- Save it and Reboot, adding the above code will give you a new “Security Tab” on your Charji router web page
- Rest is simple (after all that is why you came here) to do Port Forwarding just go to NAT under your newly enabled Security TAB and add the local IP and port you want your external traffic of that port to route too
- That is it , Enjoy your Rooted PTCL EVO Device with Port Forwarding enabled.
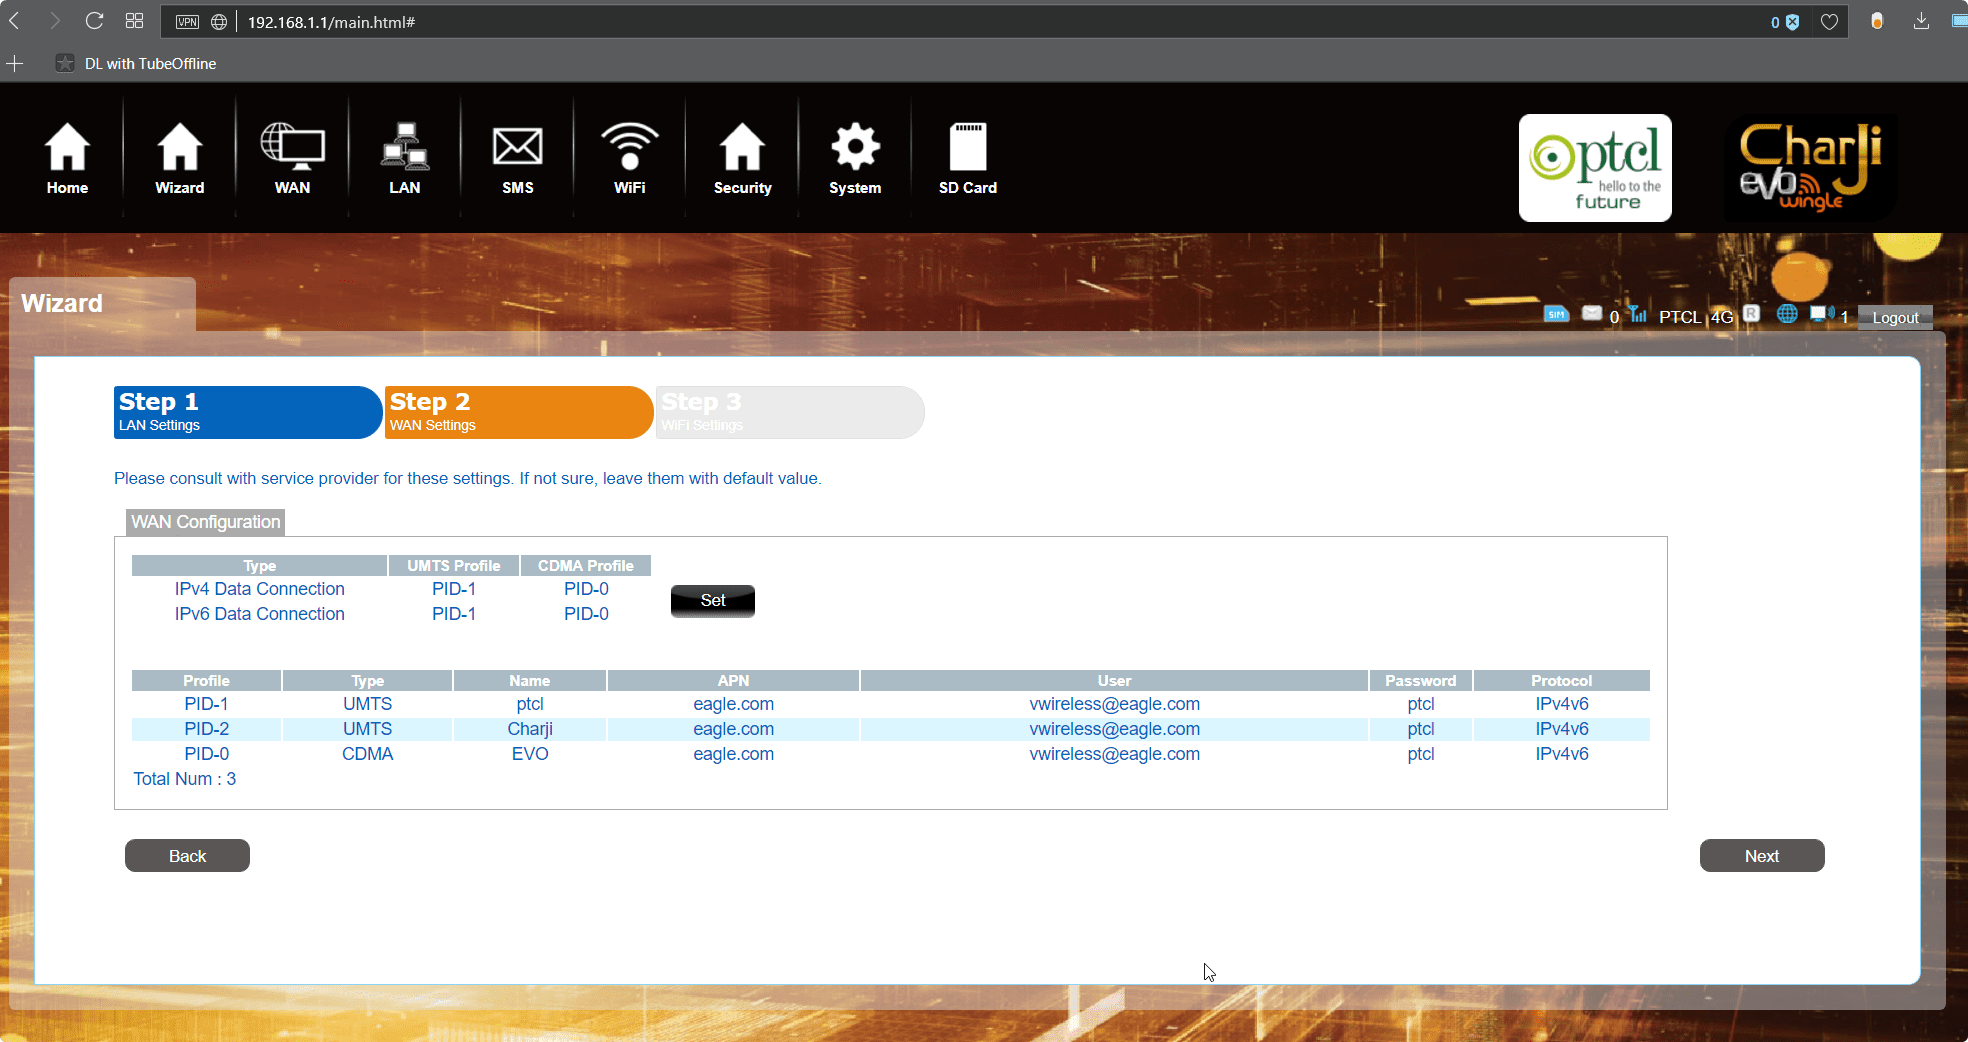
Enable Wizard Mode on your PTCL Charji / EVO Device
Using the menu.js file you can enable the Wizard Mode option which allows you to adjust main PTCL configuration (be advised if you mess this up you may lose device connectivity). Just like the System code we added above for Wizard Tab you have to add :
["Wizard", "navi-wizard", "wizard.asp",
null
],
Or you can Copy the complete Menu.js Code
That is for all for this and thanks alot to TimeMatcher for making this post possible. If you have some more tips to make it better or want to share your experience or query drop those in the comments below.
Notes
- This Tutorial was made using a PTCL Charji Wingle R660 A device manufactured by GadgeIT but it is same for all Qualcomm chipsets which are mostly used by PTCL. PTCL Wingle / Cloud / EVO / Charji all devices uses the same chipsets
- GadgeIT is a strange business, while doing my PTCL Charji Cloud R600A post i tried finding them and ended up contacting one of their tech guys and strangely they have one messed up website which doesn’t even have all updated info but if you want to head over , its called Swift Biz Solutions
- For Android OS Devices (like EVO TAB) you will need busybox to go through the rooting, that can be flashed from adb aswell


bhaiyya ye hui na kaam ki post!
double thumbs up (Y)
[…] Update: How to Hack PTCL Charji / Wingle / EVdo : [Tutorial] Root PTCL Charji Wingle – Port Forwarding […]
thank you :p
Bro I am connecting evo wingle and running dl.exe but it just says ” Wait for device…” https://uploads.disquscdn.com/images/d53d694188d752f7ceebde042bc27c79a493457be7e293a264c3ce07bae8c68a.png
run the cmd with administrative rights
and hope adb drivers are installed and working ?
if you do adb devices does it show your device ?
Thanks for reply
Yes I have tried running on admin but same problem
adb is installed and working but when I enter “adb devices” there is no device listed
There is one unusual thing happens when I plug evo I cant access its software the drive disappear immediately after windows notification pop up.
https://uploads.disquscdn.com/images/5824d61ee1a0b7e8148a77029a0c3cafe9b2ad9adbc85bb4344d2787c2ec1060.png https://uploads.disquscdn.com/images/f295d341ccee30349c831f38526dff7c0efb122186d0520d131dfc98c4b5afa2.png
this drive disappearing thing should not happen , try plugging it in some other laptop .. and see what happens there ? ..
it could be the reason your device is not being detected by adb
just tried plugging into different computer and as soon as I installed the evo usb drivers the drive disappeared.
so, I think they might have changed the firmware version.
i think its more to do with the drivers being installed on the OS
mene dlink wala software run ker dya ab devise ki power pink or signal red hogya he kuch bhi access nhi hora kindly guaid me
Bro how to portforward ptcl router? i set my ip as static and i open up a port in router. but port is not completely opened and unable to listen. what to do now? i am doing this in linux. help plz
Hi, AOA, So i ended up with a bricked device, so it will be really nice of you if you can provide a stock firmware of evo charji r660a.thank u.
Sorry for joining late thread…
and can you please make a video of it?
what is telnet?
a network protocol that allows a user on one computer to log into another computer that is part of the same network
a network protocol that allows a user on one computer to log into another computer that is part of the same network
thanks and can you please share r600a unlock?
Okay, I will give it a try. and update you here,
also If I do it, I am gonna make a video for others. you can post it on here then.
is this method still working ?
Should I try it with PTCL charjee cloud?
havent tried , but if the versions are same I dont see any reason why it won’t
sir is device ka softwate jo is ka sath hota h wo mari device ma nai h kindly ap wo muje da skty han ma apni device ma login nai kr skta wo page hi nai ata h 192.168.1.1 ip a rhi h mere pas dhcp h kia ap mari help krygy